A hairline crack beside a window, chalky paint on a sun-facing wall, or a dark stain beneath a soffit can become a much larger problem after one South Florida rainy season. Learning how to seal exterior walls is not simply a painting task. It is a home-protection decision that helps control moisture intrusion, UV damage, mildew growth, and the relentless heat that works against your comfort and cooling budget.
A lasting result comes from treating the entire wall system – substrate, cracks, transitions, primer, and protective finish – rather than applying a fresh coat over an existing problem. Here is what homeowners should understand before exterior sealing work begins.
Start With the Reason Your Walls Are Failing
Exterior walls do not need sealing just because the color has faded. Fading is common in Florida, but it can also signal that conventional paint is losing its protective qualities under intense UV exposure. The more urgent warning signs are cracks, peeling, bubbling, soft stucco, recurring mildew, rust stains, white mineral deposits, or water marks around windows and doors.
These conditions point to different causes. A vertical crack in stucco may be movement-related. Peeling paint can mean trapped moisture or poor surface adhesion. White, powdery deposits called efflorescence often indicate moisture moving through masonry. Caulk that has pulled away from a window frame creates a direct path for wind-driven rain.
That distinction matters because no coating can perform as designed over an unstable, damp, contaminated, or poorly repaired surface. The first step is not choosing a color. It is identifying where water, heat, and deterioration are entering the system.
How to Seal Exterior Walls the Right Way
Proper wall sealing follows a sequence. Skipping one stage may save time on the front end, but it often leads to premature failure and another exterior project far sooner than expected.
1. Inspect Every Wall and Transition Point
Walk the property during daylight and look beyond the main stucco field. Pay close attention to window and door perimeters, wall penetrations for utilities, hose bibs, light fixtures, vents, soffit lines, masonry joints, parapets, and the connection between walls and rooflines.
In South Florida, wind-driven rain can force moisture into gaps that look minor from the ground. Areas near the coast also face salt air exposure, which accelerates surface breakdown and corrosion. A professional inspection should assess the condition of the existing finish, the integrity of the substrate, and whether cracks are cosmetic or evidence of a larger issue.
If there is active leakage, structural movement, damaged flashing, or rotted framing, address that repair before applying any exterior sealant or coating. Sealing over a problem can trap moisture where it does more damage.
2. Clean the Surface Without Damaging It
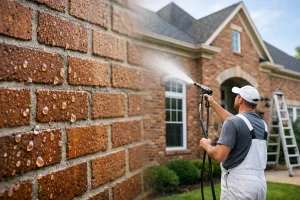
A clean wall is essential for adhesion. Dirt, mildew, salt residue, chalking paint, and airborne contaminants create a barrier between the substrate and the new protective system. Pressure washing is often part of the process, but pressure alone is not a cure-all.
Too much pressure can scar stucco, drive water behind siding, or loosen already weak finishes. The correct cleaning method depends on the wall material and its condition. Mildew requires appropriate treatment, while heavy chalking may call for specialized surface preparation and a compatible primer.
The wall must also dry adequately before repairs, priming, or coating. Florida humidity can extend drying time, especially on shaded walls or after frequent rain. Applying materials to a damp surface is one of the most common reasons exterior coatings blister, peel, or lose adhesion.
3. Repair Cracks Before You Coat
Cracks are not all alike. Fine, non-moving hairline cracks in stucco may be addressed with a high-quality flexible patching material. Larger cracks, damaged areas, failed previous repairs, and cracks that return after patching need closer evaluation.
The goal is not to smear caulk across every visible line. The repair material must be compatible with the existing wall, properly tooled, and allowed to cure. On stucco, a repair should blend into the surrounding texture and create a stable base for the coating system.
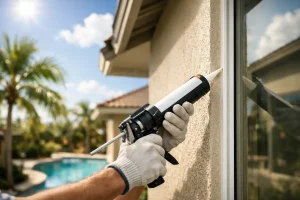
Wide openings around windows, doors, trim, pipes, and fixtures require exterior-grade sealant designed for movement and weather exposure. Old, brittle caulk should be removed where practical before fresh sealant is installed. Simply applying new caulk over failed material rarely produces a reliable seal.
4. Prime Where the Surface Calls for It
Primer is not always optional, especially on porous stucco, bare masonry, repaired areas, heavily chalked surfaces, or walls with stains. A properly selected primer helps bind the surface, create an even base, and support adhesion between the wall and the finish coating.
This is where generic paint-store advice can fall short. Exterior systems are designed to work in layers. The patch, sealant, primer, and top coating should be compatible with one another and appropriate for the substrate. A premium coating cannot compensate for a primer that is wrong for the job.
5. Choose a Coating Built for Florida Exposure
Basic exterior paint can improve curb appeal, but it may not deliver the heat control, color retention, flexibility, and long-term weather resistance many South Florida homes need. Conventional paint can fade, become brittle, or require frequent repainting under strong sun and high moisture conditions.
A high-performance exterior coating system is designed to serve as a protective barrier, not just a color layer. TEX•COTE® COOLWALL® coatings, for example, are engineered to reflect more solar heat than conventional exterior paints in comparable colors. That can help lower wall surface temperatures and reduce heat absorbed by the home.
The right product depends on the wall material, existing finish, exposure level, color selection, and repair history. Darker colors can absorb more heat, while certain walls receive harsher afternoon sun or salt exposure. A qualified contractor should recommend a system based on the property rather than treating every home as the same.
6. Apply the System at the Proper Coverage Rate
Coatings are only as effective as their installation. Thin application, missed areas, poor back-rolling, rushed dry times, and coating during unsuitable weather can all compromise performance. The product must be applied at its specified coverage rate and in the recommended number of coats.
This is especially important around repaired areas, wall penetrations, trim transitions, and other details where water tends to collect or enter. A uniform finish is more than cosmetic. It helps provide consistent protection across the wall surface.
Factory-certified application teams understand the preparation and installation requirements behind a warranty-backed system. That expertise protects the value of the coating investment and avoids the frequent repainting cycle homeowners are trying to leave behind.
Common Exterior Sealing Mistakes to Avoid
One of the costliest mistakes is coating over mildew, chalk, loose paint, or active moisture. The wall may look refreshed briefly, but the coating can fail from beneath. Another is using interior-grade or low-performance caulk outdoors, where heat, rain, and expansion quickly cause it to crack or pull away.
Homeowners should also avoid assuming that every crack is cosmetic. A recurring crack, a crack that widens, or one paired with moisture staining should be assessed before sealing. Finally, do not select a coating solely by initial price. A low-cost repaint can become expensive when it needs to be repeated every few years.
When Professional Exterior Wall Sealing Makes Sense
A small, isolated caulk failure may be manageable for an experienced homeowner. Whole-home wall sealing is different. It requires evaluating substrate conditions, safely reaching upper elevations, handling repairs correctly, choosing compatible materials, and applying a finish system that will stand up to Florida’s climate.
For homes with widespread fading, cracked stucco, recurring mildew, sun-baked walls, or concerns about energy efficiency, a professional coating evaluation provides a clearer path forward. Tri-County Painters combines licensed building contractor expertise with factory-certified application of advanced protective coating systems designed for long-term exterior defense.
Your exterior walls should do more than look clean on the day the work is finished. When properly repaired, sealed, and coated, they can help protect the structure, preserve curb appeal, and give you greater confidence every time the sun intensifies or the next storm moves in.